Thursday, November 26, 2009

Pre Teen readings of Mr Rawat


You guys know I used to be a vociferous reader still am…, I don’t know how it started but from the time I remember was bookworm for stories and comics.
I started with CHAMPAKs and LOT POT(remember Motu-patlu /chacha choudhary/Pinki/Saboo) but one comic which was to catch my Fancy and quench my thirst for particular brand of humour was DIWANA Indian version of international satire magazine MAD.

Soon graduating from NANDAN I moved to more serious and reader’s digest like PARAG which was monthly Hindi children's magazine published from Delhi by The Times Group in the 1980s and 1990s, CHANDAMAMA was ever favorite with its southern favour and pictures drawn by Chitra and Shankar totally identifying with rural milieu and fiction.
All along comics continued of all hues ..one was MADHU MUSKAN a weekly comic magazine from the publisher of the popular film magazine 'Mayapuri'. Though not a comic in the strict literary sense, Madhu Muskan was more than a magazine, almost nearer to any comics published. 90% of the pages containes illustrated comical stories featuring various characters popular at the times. I had joined multiple comic rental shops by than and devoring comics by dozen a day.
I was doing adult stuff as well DHARMAYUG, SAPTHAIK HINDUSTAN I read all…one serious magazine was KADAMBINI and is still published by HT Media Ltd.
Just on threshold of teens my fancy became English fiction like THREE INVESTIGATORS and HARDY BOYS..simultaneous to ENID BLYTON..all the books came form kabadi bazaar..i hardly could have afforded new books.
Curiosity killed the cat..on sly MANOHAR KAHANIYAN was being ravished, I got big time into hindi pulp fiction likes of Ved parkash Sharma, Om parkash Sharma and others.


Thank god for this habit……. being a commodity trader I can identify with the saying “ The stock market may go up and down,the economy may go boom or bust, Words are a commodity in which there is neveranyslump."

Wednesday, November 25, 2009

‘Holi Aayi re’--- 70s movie shot in Belonwala- Doonga

There was a film that was released in 1970, which starred Balraj Sahni, Mala Sinha and Shatrughan Sinha, "Holi Aayee Re." It may have not done well when released but the story was based on a man and a woman who get involved in a moment of passion on "Holi," which leads the woman to become pregnant and leads to tragedy when the father of the girl kills the man and is arrested and the girl's mother is killed in an accident. However, the young girl tries to kill herself but then is saved and has to look after her young brother.

Mala Sinha’s co actor was some non entity called Parkash Thapa..

………..But more than that. An Entire song was picturised in scenic locale of my ‘Belonwala’ and ‘Doonga’ the village next door, there used to be a pine plantation over a small hillock now its replaced by Euclyptus trees(Signs of time) and our own ‘Choudhary’( Local landlord who lost lordship when we won independence and now live in famous ‘Dunga house’ hotel) I think he was called as told by Ma and Pa ‘Munna’ who played a small bit of a flute playing shepherd in that song, I think Choudhary had developed Bollywood fixation and lost great amount as one of the financier…anyhow its all hearsay but thing is Belonwala does qualify to be filmi location like Switzerland.

Wednesday, November 18, 2009

How to change Excel's CSV file delimiter

If you are performing a database bulk load and the data has been sent to you in excel sheet format, a well known technique is to first convert this data into a CSV file. Excel has in-built feature that does this conversion for you; it delimits fields with a comma so when the file is loaded, you can use the same delimiter to tell the database how to process the CSV file.

This technique almost always works seamlessly except when a field contains a comma as part of its value. In that case, the database loader gets confused and treats the comma as a field delimiter and you end up getting error on that particular row of data.

To avoid this issue, one can use another character than a comma to delimit the fields. That way an existing comma value doesn’t cause any confusion. However, this required additional task of opening up the CSV file in an editor and manually making the modifications that isn’t highly desirable.

Fortunately, comma as a default delimiter is not inbuilt in the Excel program; rather it’s a property at the OS level. All you have to do is modify that property from a comma (,) to let’s say a pipe (|), and bingo. The next time you create a CSV file, Excel automatically uses the pipe as the delimiter, and your converted file is all set for the database loader.

Use the steps below to modify the list delimiter:

Step 1 -> Launch Regional Settings from Control Panel

Step 2 -> Press the Customize button on the ‘Regional Options’ tab

Step 3 -> Set the List Separator and save your settings.

Tuesday, November 10, 2009

Delhi treasure hunt -Trip to National Museum/National Zoological gardens

Its been almost 5 years now when I have shifted base to NCR and comfort with Cosmo/Metro-National capital is coming albeit slowly, people spend entire lives and never explore the treasure trove Delhi is.I found to my surprise the Delhi Zoo surpasses Singapore zoo and night Safari despite their great packaging by miles in terms of habitat and natural surroundings the animals live in, same stands true for national museum which is not inferior by any standards to museum of Egypt etc in terms of treasure trove it holds.

(Natraj to start with)

(Museum is full such resplendent beauties)

(Coins from all era)

(Lost in maize--remember Enter the Dragon)

(History for you all duffers)

(Mask we wear everytime)
(Beware!!)
(Beware Twice !!!)

(all the kings man )
(Please bear with me)

(That's cool)


(I think Delhi Zoo is paradise for nseting /transitory/migatory birds)

( I was born in Africa)

Please come Again

Monday, November 9, 2009

Duggi….Teegi....Panji


(Photo courtesy National museum , New Delhi)
Any of you remember this currency, it was almost like age of innocence passing away when these faded away from memories, by the time were kindergarten kids most of these were only meant for leper- beggars sitting near Ghantaghar behind post office on the alley which came from Chukhu wala through kumhar mandi.

After this was era of Dassi which still fetched sticky sugar lollies till we were taking rides from city bus stand to school at RTO with bus passes made zillions of years back and conductor too in know of things.
Chavvni was a prized gift given by my Nani whenever we came back from summer vacations in Belonwala.

Attahni is not accepted any more by anyone, time is on when one rupee/two rupee coins are almost passé, our innocence was benchmarked to chavvni-attani , gen next will see fading away of INR 10 coin and will vouch for the era.

Sunday, November 8, 2009

How to create a Windows shortcut bar

Desktop is an integral part of your work environment today. Whether it’s checking your corporate email or working on a spreadsheet, or just looking at your files, there can be 10s of tools and applications that you need to work with on an everyday basis. Wouldn’t it be convenient if this set of tools and applications that you need to launch multiple times during the day is available to you on a single shortcut bar? Once you have this bar setup, there is no need to ever go through the traditional Start -> Programs route. Each application is only a click away. Here are the instructions to setup such a shortcut bar on your desktop.

(Note: this example has been setup with Windows XP OS. If some of the instructions don’t work on your OS, you may have to figure it out for your windows version, for e.g., by searching on the internet.)

1) Create shortcuts for the tools and files that you want to add to your shortcut bar ->

A. To create a shortcut of an application that exists in your Start menu, navigate to the application, right click on it, select ‘Send To’ option followed by Desktop(create shortcut) option. This will send the shortcut to your desktop.

B. To create a shortcut of a file or document, locate the file in Windows Explorer, right click on it, select ‘Send To’ option followed by Desktop(create shortcut) option. Creating a shortcut will ensure that only a link to your file is created, and when you click on the shortcut, the file located in the original location gets launched and edited.

C. If there is an application that’s not available through the Start menu, then you can locate it using Windows explorer, once found, right click on it, select ‘Send To’ option followed by Desktop(create shortcut) option to create a link to the application on your desktop.

2) Set up a folder called ‘My Tools’ under the root directory of your local drive (c:\My Tools). This will house all your shortcuts.

3) Cut and paste all the shortcuts, that you created above from your desktop to ‘My Tools’ folder

4) Right click on your task bar (task bar shown below), and navigate to Toolbars->New Toolbar (Click on the image below)

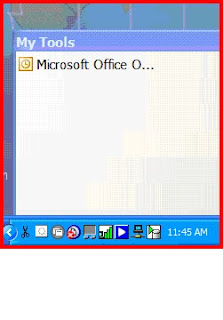
5) In the ‘New Toolbar’ dialog box, browse to ‘My Tools’ folder, and click OK. ‘My Tools’ toolbar appears on your taskbar. (Click on the image below)

6) Right click on your task bar again, and make sure ‘Lock the Taskbar’ option is unchecked.

7) Minimize all the applications on your desktop so your desktop comes in the forefront.

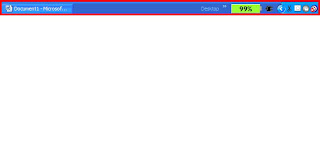
8) Drag the ‘My Tools’ toolbar from your taskbar by holding the left mouse key, and release the key to drop the ‘My Tools’ toolbar on your desktop. This separates your custom toolbar from the taskbar. (Click on the image below)

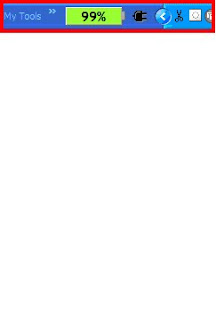
9) Right click on the ‘My Tools’ toolbar and make sure the ‘Show Text’ option is unchecked, ‘Always on Top’ option is checked, and ‘View-> Small Icons’ option is checked.

10) Drag the toolbar by holding the title of the bar with left mouse key and drop it at the top of your screen. Once you do that the bar automatically takes horizontal shape. Readjust the width so the bar takes the least amount of real estate on your screen. (Click on the image below)

11) Once your toolbar is in place, adding new items to it is very easy, bring up your item either through Start menu or locate it in Windows explorer, drag and drop the item on the toolbar using the right mouse button (not left). Once dropped, choose the ‘Create Shortcuts here option to directly create a shortcut of your desired application on the toolbar.

12) And that’s it. You are all set. All this hardwork for the initial setup will payoff as you can launch any application by clicking the appropriate icon on the ‘My Tools’ shortcut bar sitting on the top of your screen.

13) If you like to change the icon of one your items, right click on the item within the shortcut bar, go to properties, and click on ‘Change Icon’ button to browse through the icons you have on your machine and select the one you want.